Questions
- How do I add an animated background in OBS?
- How do I enlarge an overlay in OBS?
- How to set a transition between scenes in OBS?
- Can I use multiple overlays in one stream?
- How to add sound to a stream overlay in OBS?
- How to change alert speed in StreamElements?
- How to add an image mask for webcam borders in OBS?
- How to add an alert in fullscreen mode in StreamElements?
1
Question: How do I add an animated background in OBS?
Answer: To use the animated background in OBS, add it as a media source and place it in the lowest position in the layer list, or drag and drop it, then move it down the layer list.
2
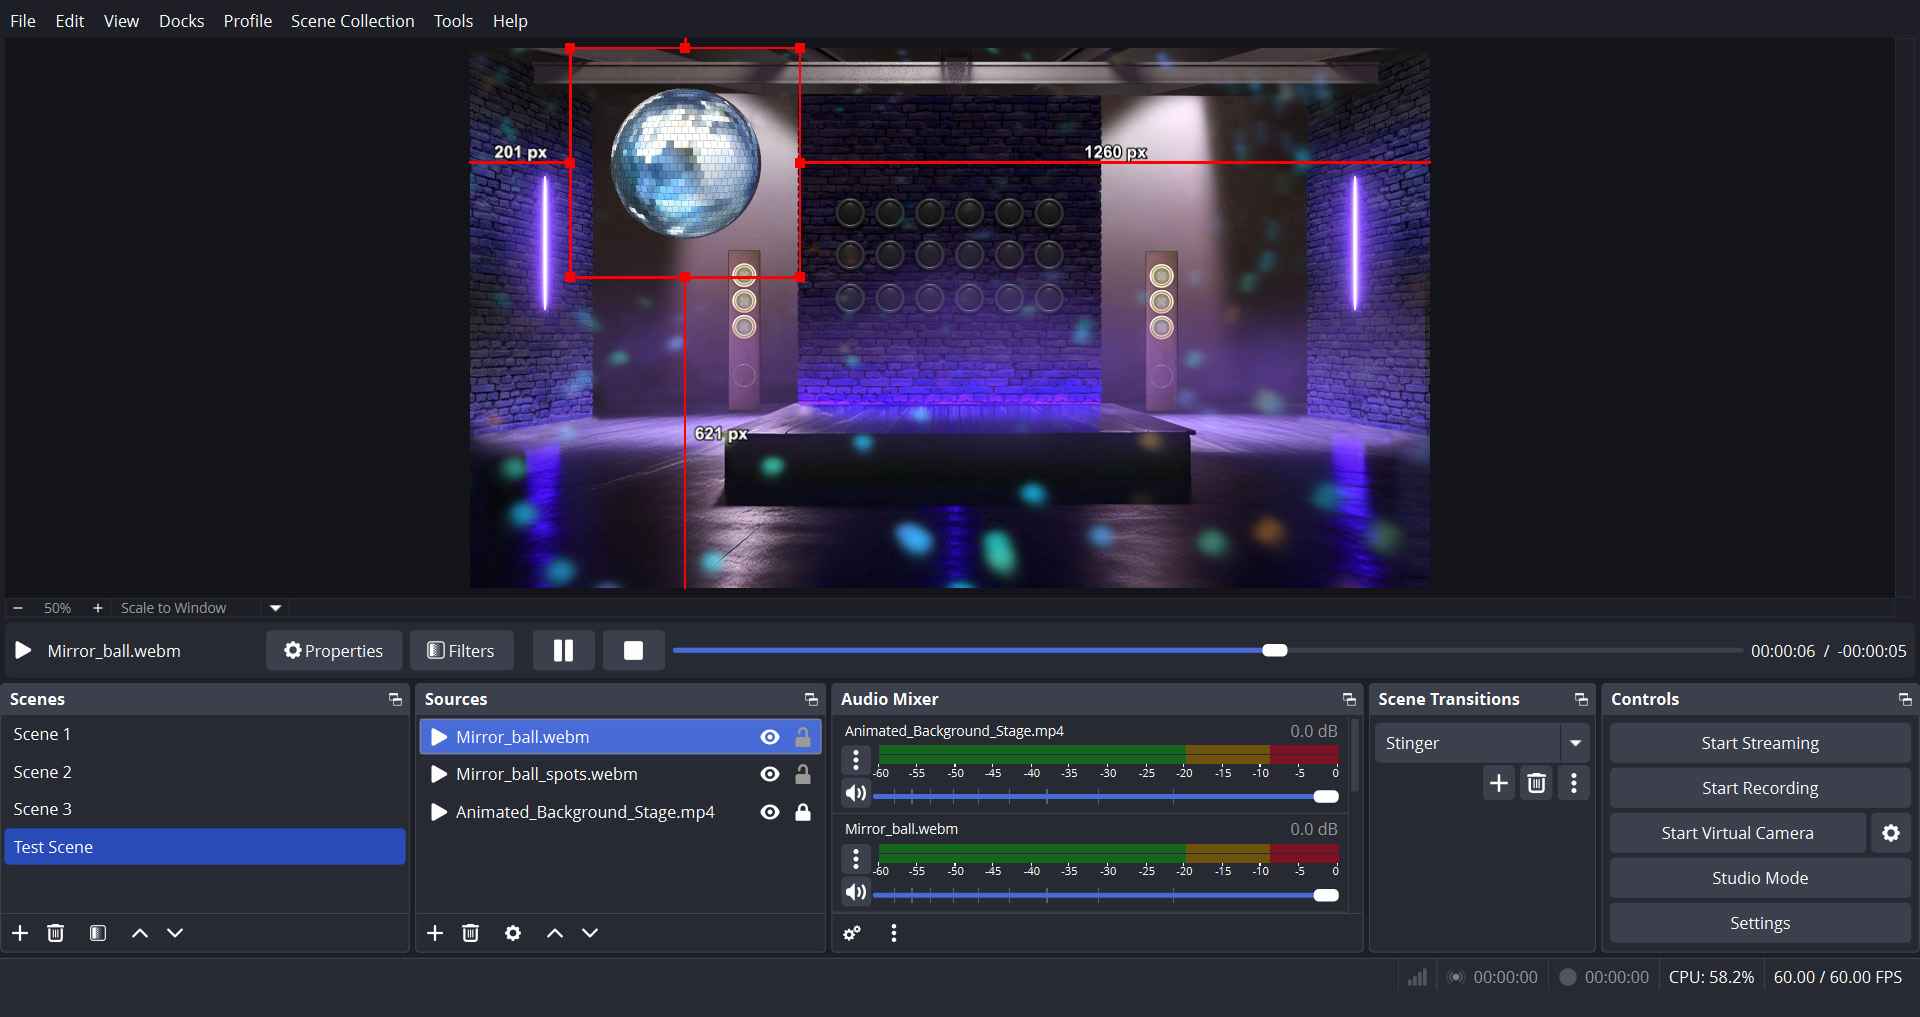
Question: How do I enlarge an overlay in OBS?
Answer: Select the overlay source in the Sources list so a red bounding box appears. Drag a corner handle outward to scale it up; drag an edge to stretch horizontally or vertically. For quick options, right-click the source → Transform → Fit to Screen or Stretch to Screen.
3
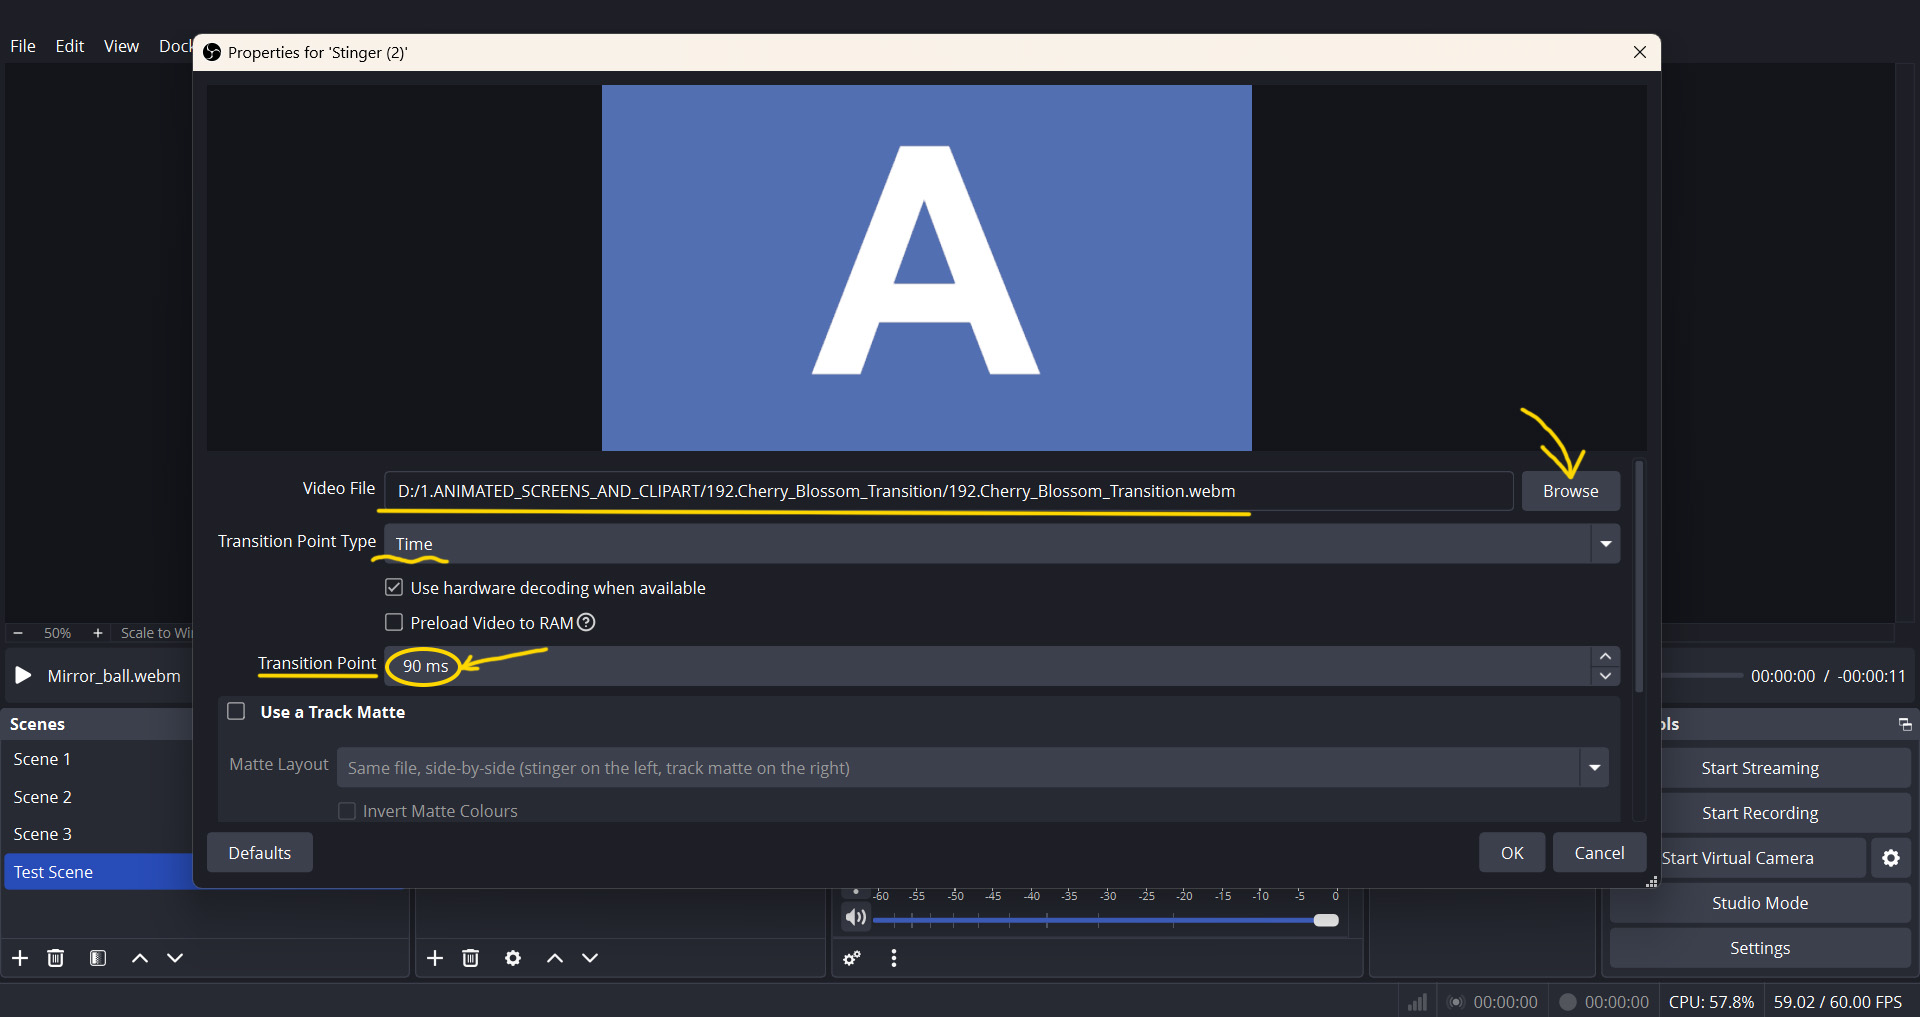
Question: How to set a transition between scenes in OBS?
Answer: Open the Transitions dock in OBS Studio and click the “+” icon to add your file (select “stinger”, give it a name – OK – Properties for stinger – Browse – add your file). After loading, set the transition point in frames or milliseconds — this is the exact moment when the transition fully covers the screen.
4
Question: Can I use multiple overlays in one stream?
Answer: Yes, you can add multiple overlays to a single stream scene and arrange them in the order you prefer. They can be turned on or off depending on your needs. Just keep in mind that adding too many animated elements may overload your scene and affect stream performance.
5
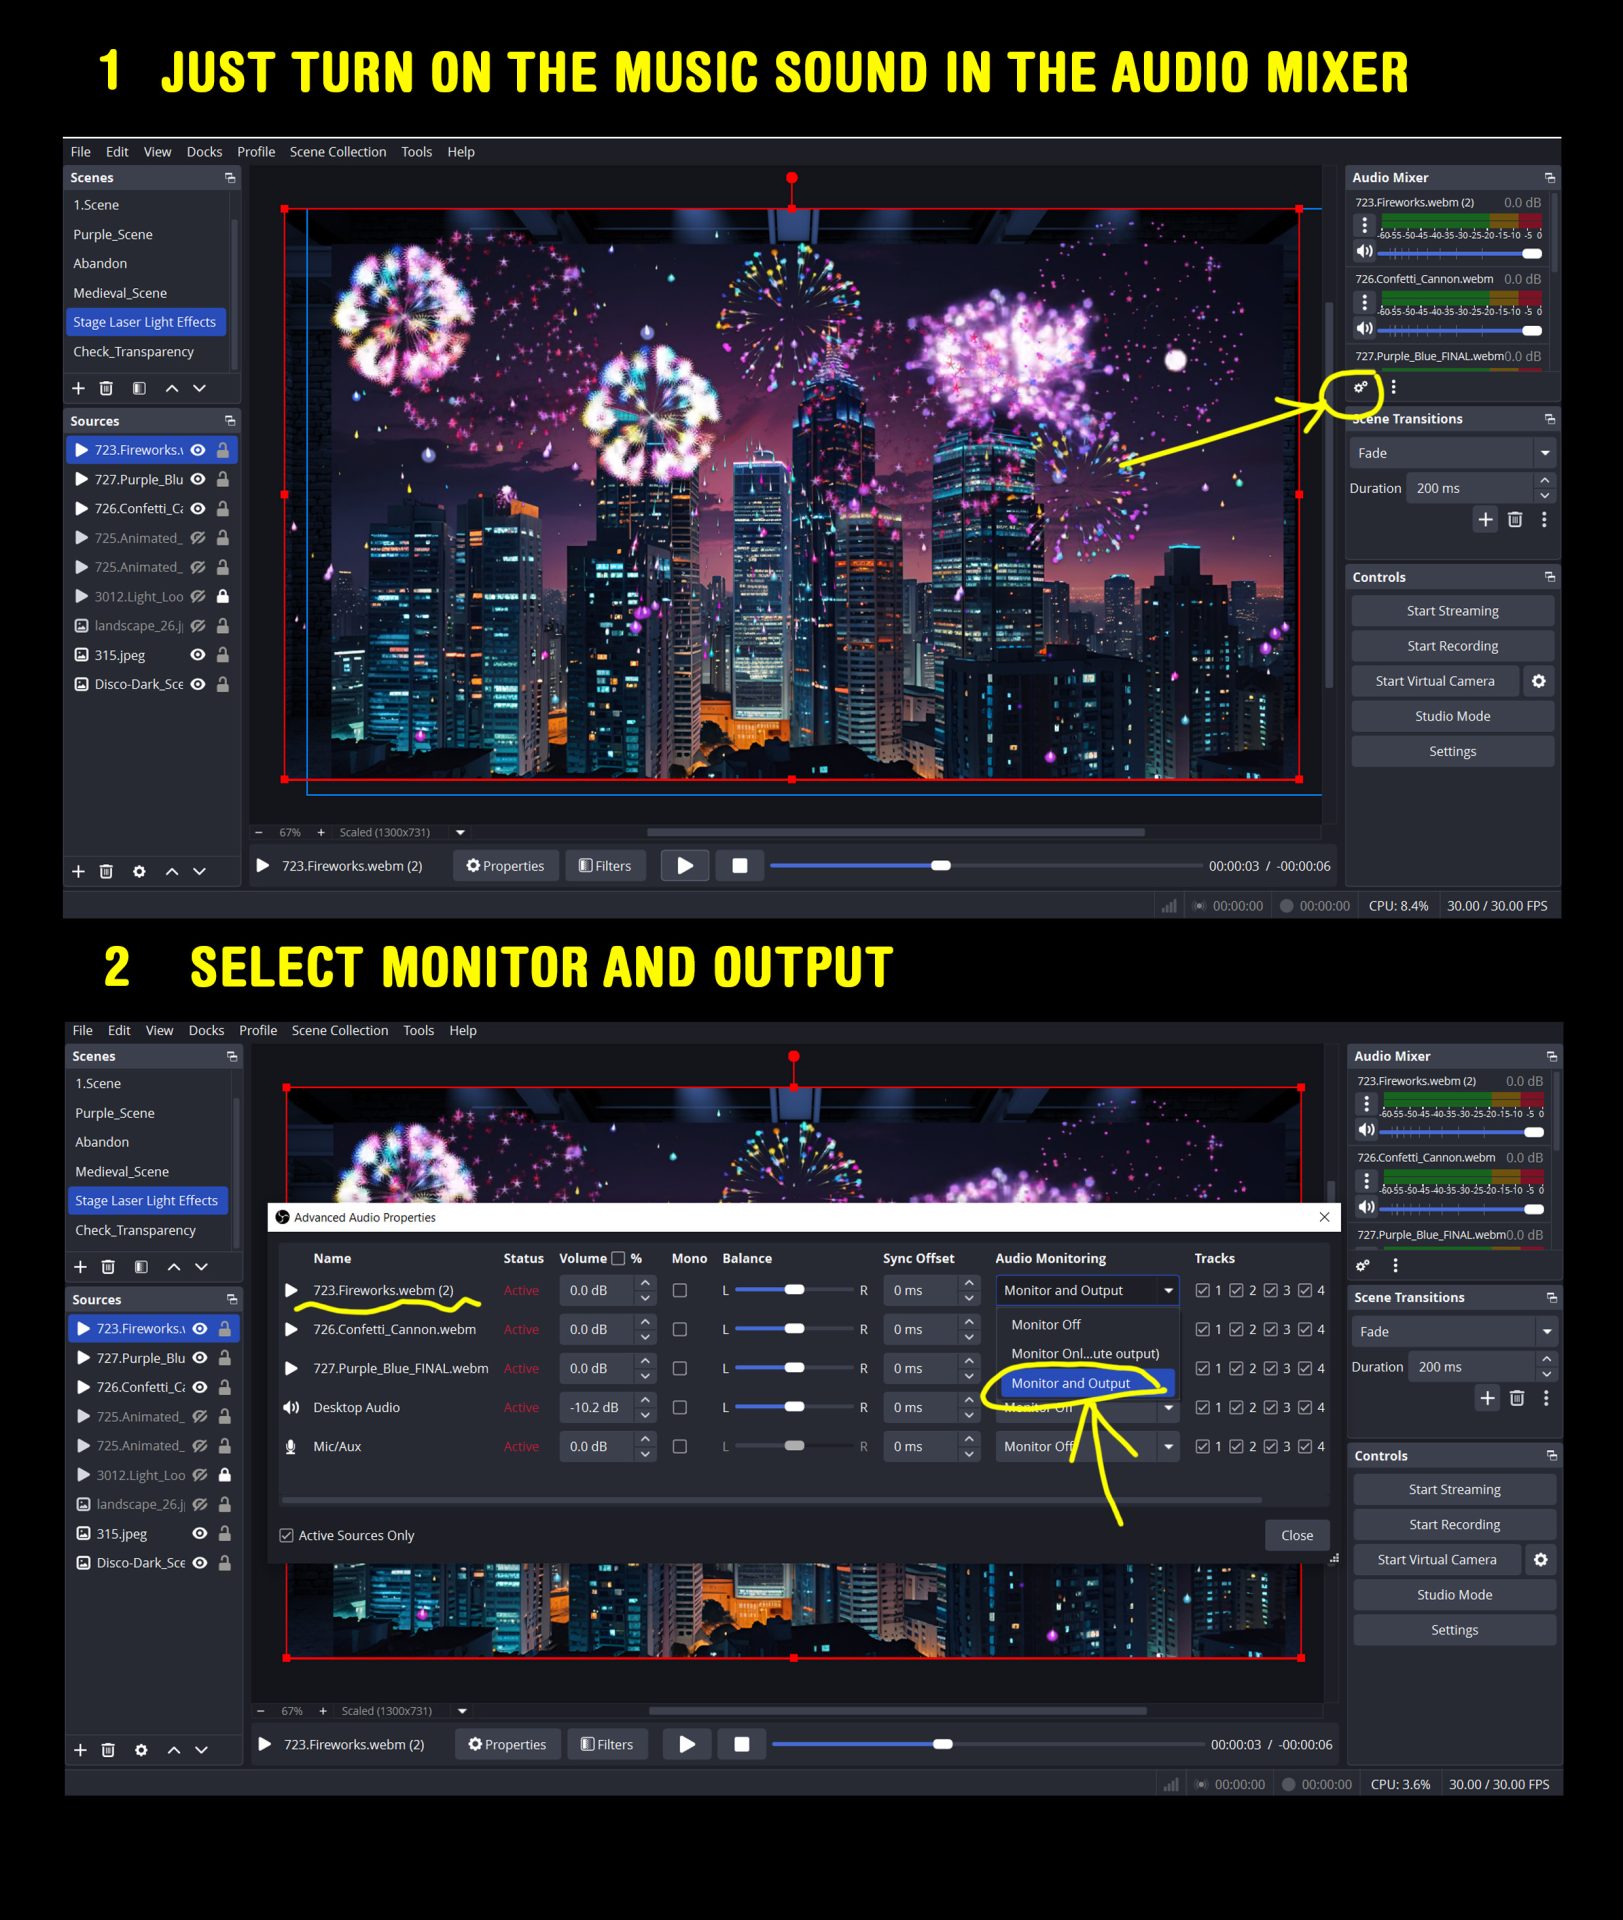
Question: How to add sound to a stream overlay in OBS?
Answer: In OBS, go to the Sources panel and add a new Media Source.
Open the Audio Mixer, click the gear icon next to your source, and choose Properties or Advanced Audio Properties.
In the Audio Monitoring column, select Monitor and Output to hear the sound yourself and send it to the stream.
Use the Audio Mixer to adjust the volume or mute the sound when necessary.
6
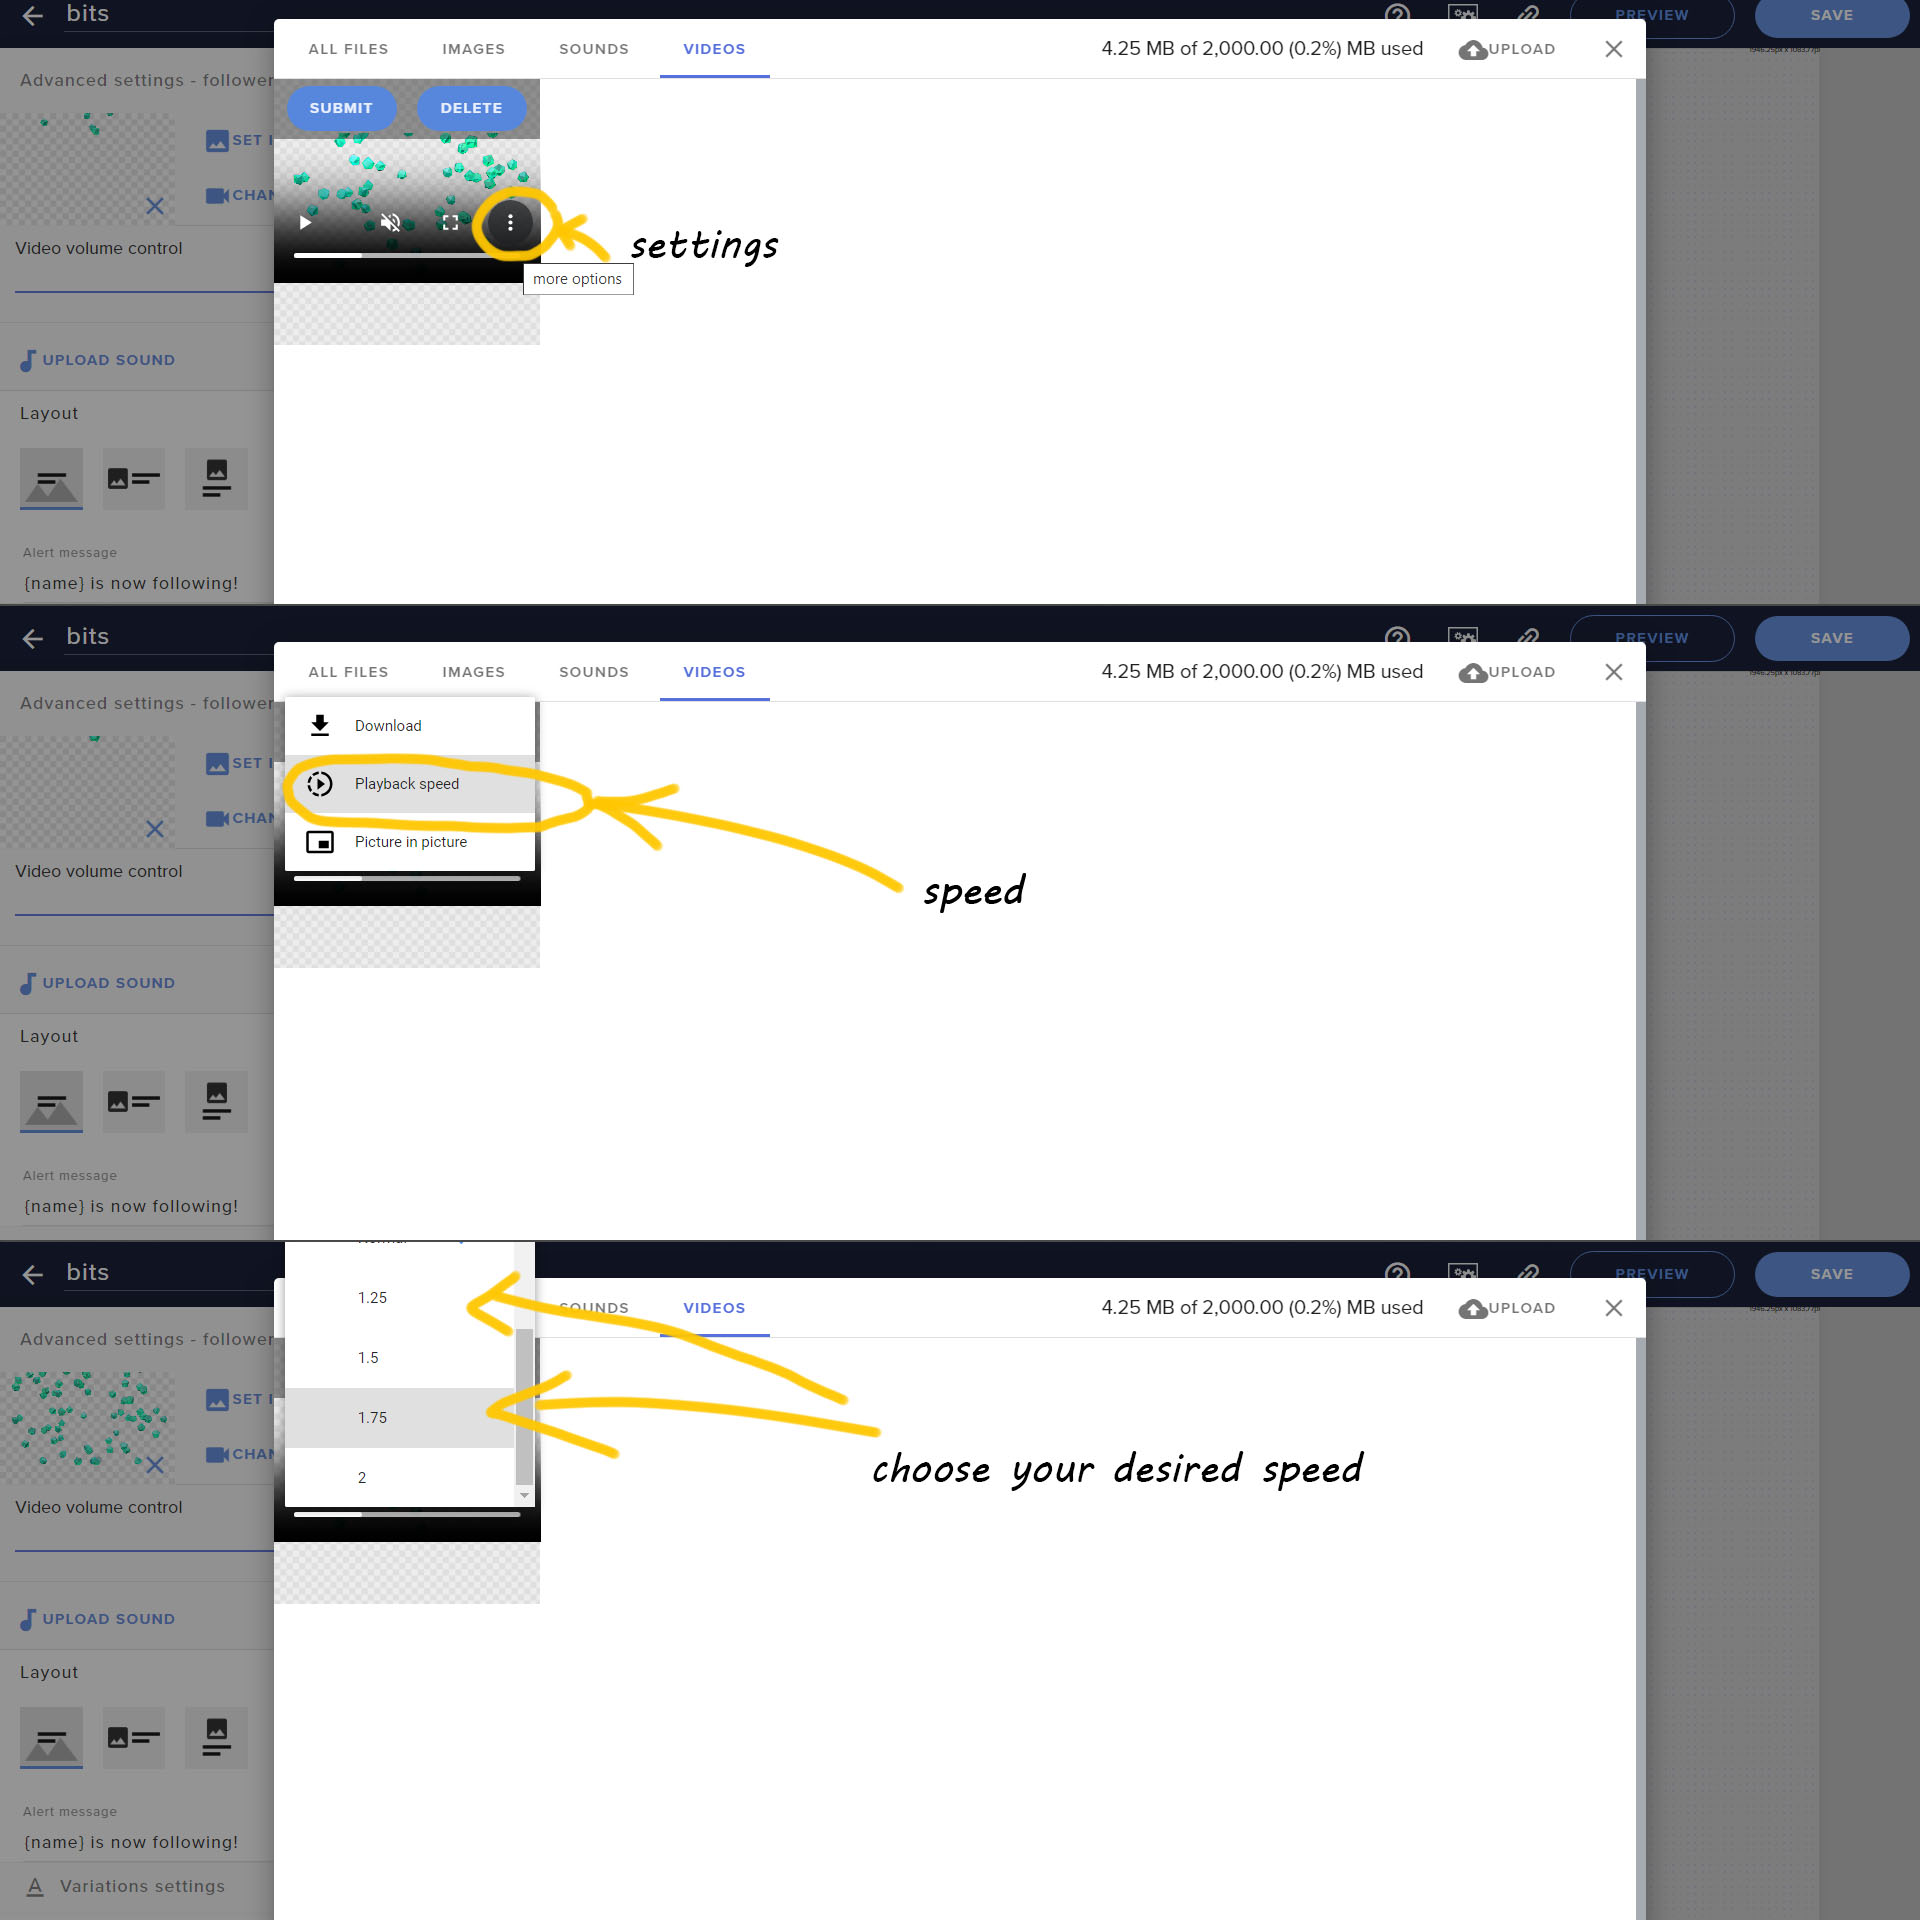
Question: How to change alert speed in StreamElements?
Answer:
1. In StreamElements, open your animated alert in the Video tab.
2. Click the three-dot Settings icon.
3. Find Playback Speed and select your preferred speed.
4. Save your changes and test the alert.
7
Question: How to add an image mask for webcam borders in OBS?
Answer:
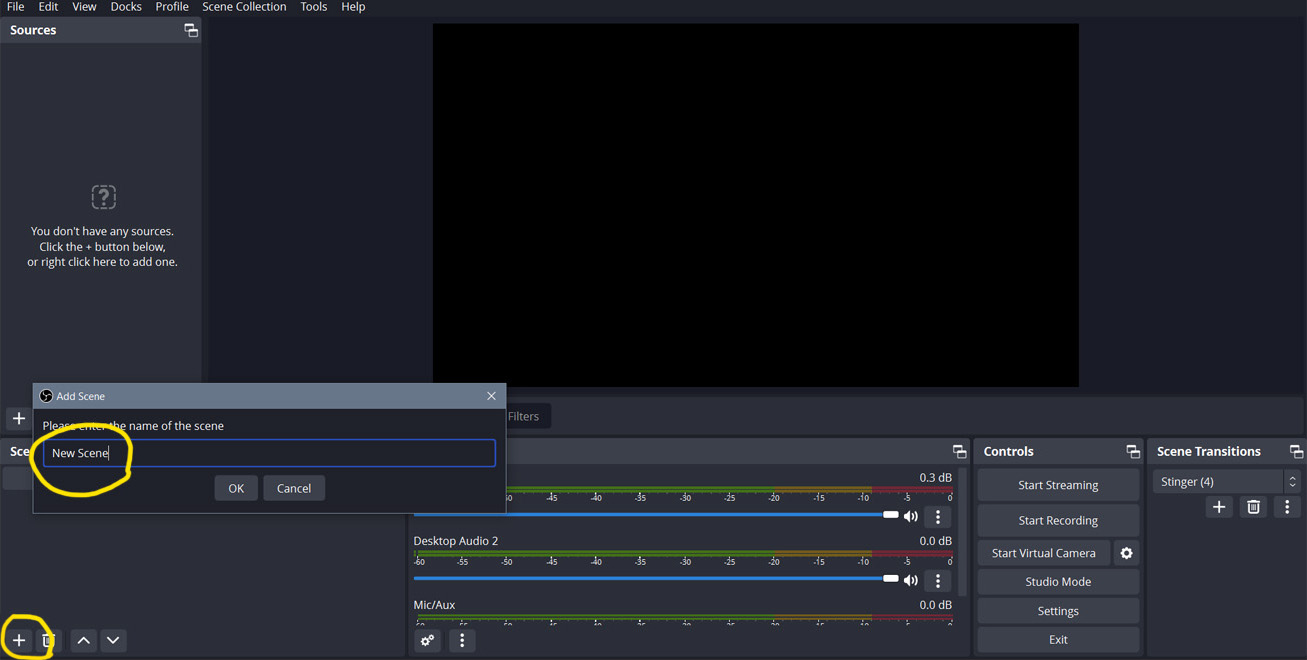
1. Create a new scene: click “+” in the “Scenes” tab. Name your scene something, then сlick it so it’s selected
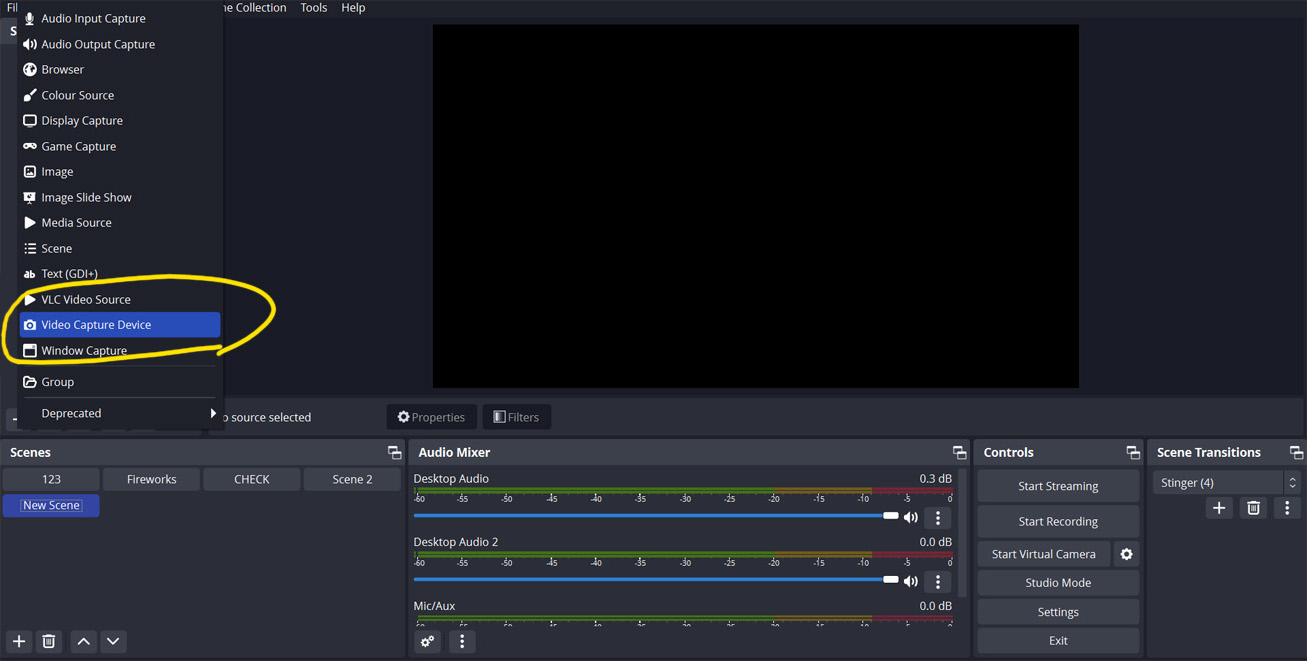
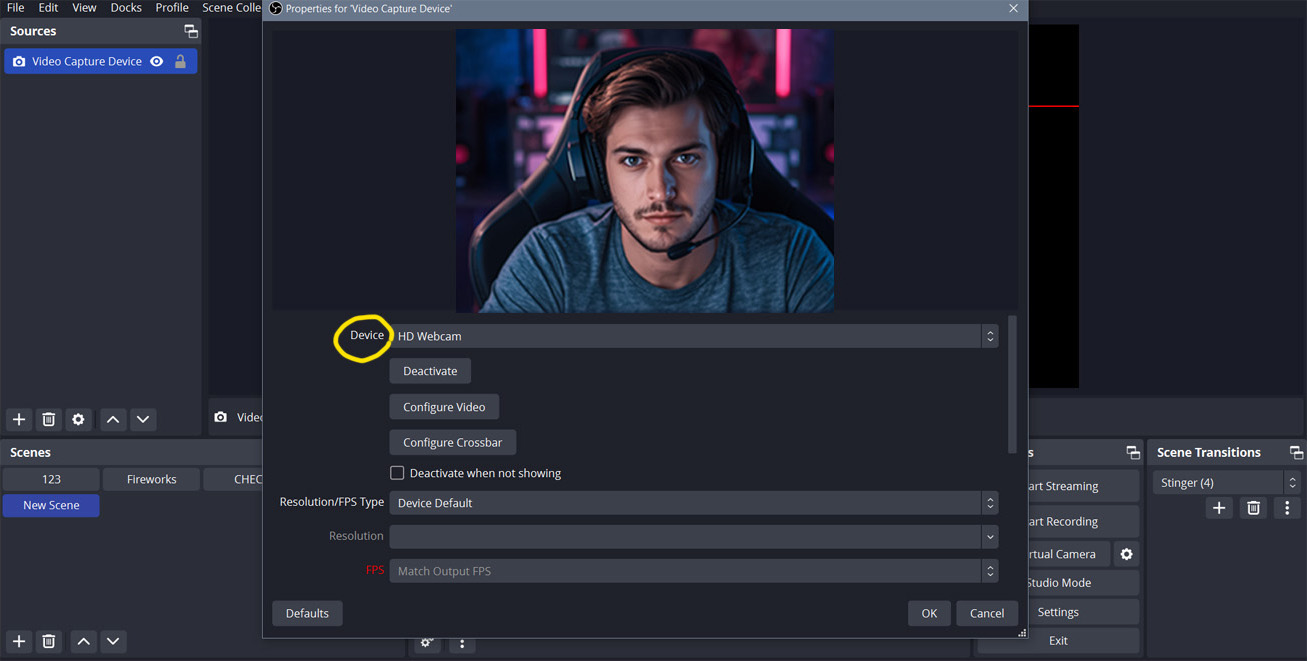
2. Add webcam: click “+” in the “Sources” section and select “Video Capture Device”. Select your camera from the “Device” section.
3. Add image mask.
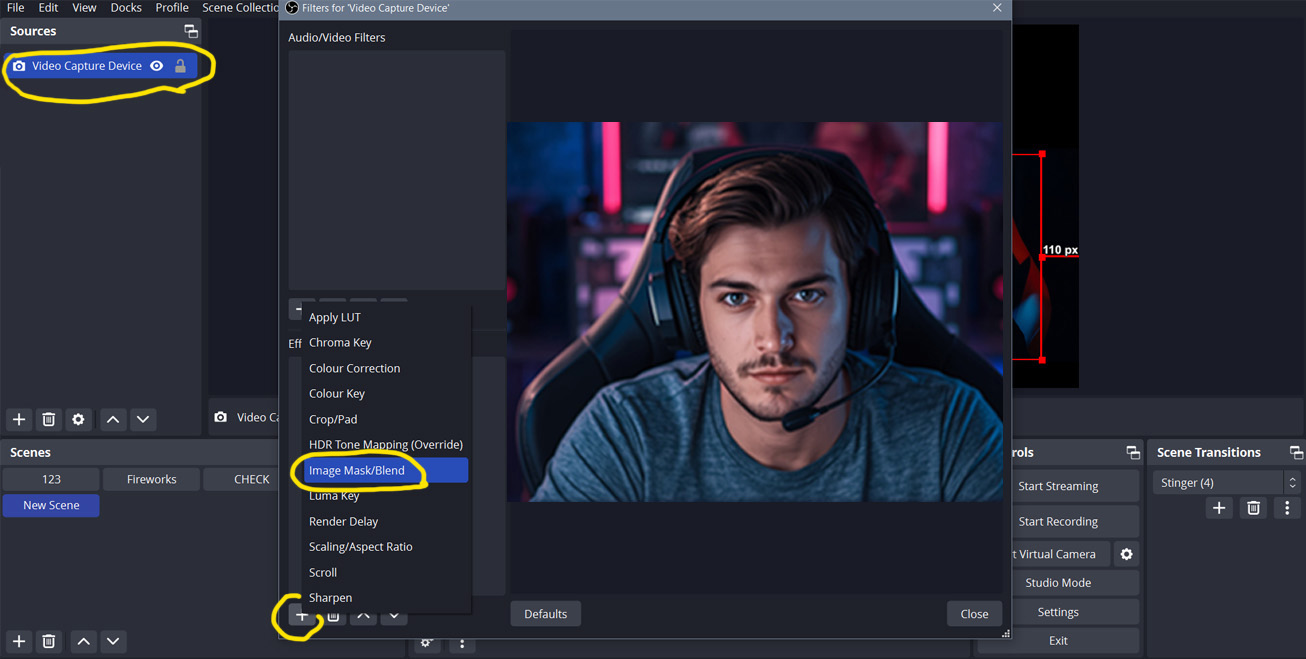
Right-click on the “Video Capture Device” source and select “Filters”. Click “+” under the “Effect Filters” section, and then select “Image Mask/Blend”
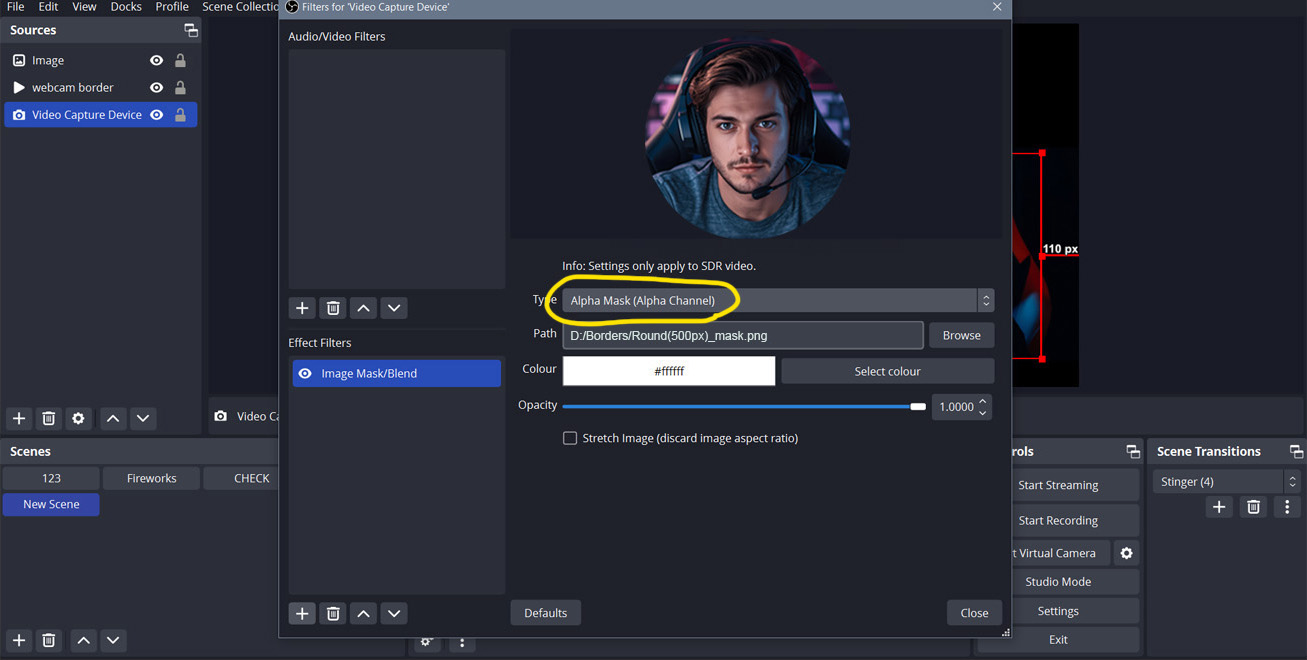
4. Click “Browse” next to the “Path” field to select and open your mask file. Make sure “Alpha Mask (Alpha Channel)” is selected in the “Type” dropdown
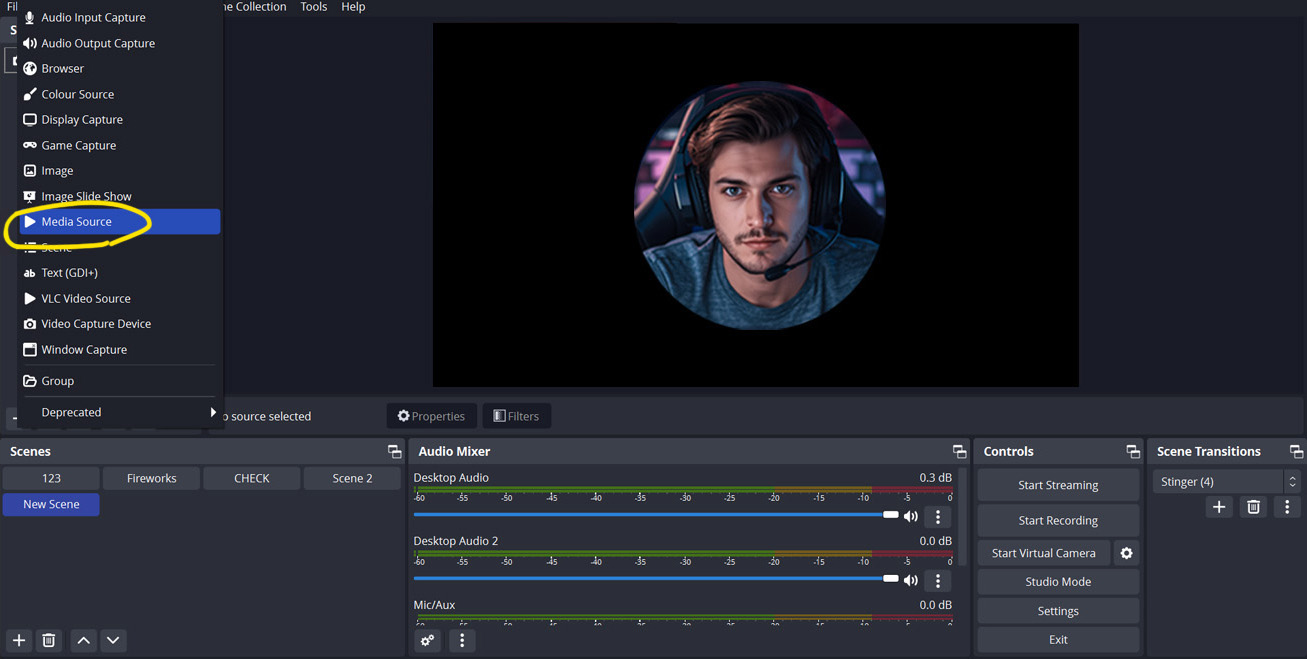
5. Add webcam border overlay as a Source:
Click “+” in the “Sources” section and select “Media Source” for an animated border or “Image Source” for a static one.
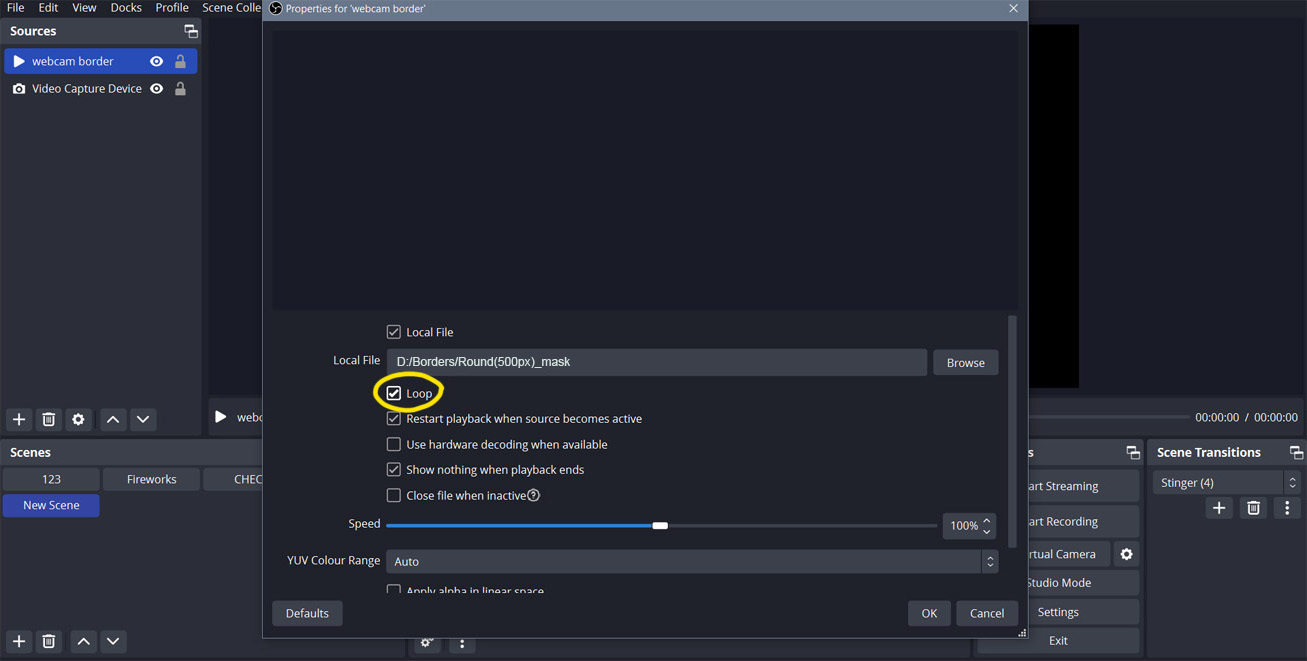
(for animated borders enable “loop”)
6. Click “Browse” in the “Local File” section, select your camera border file, click “Open,” and then click “OK”
7. Align the webcam and frame
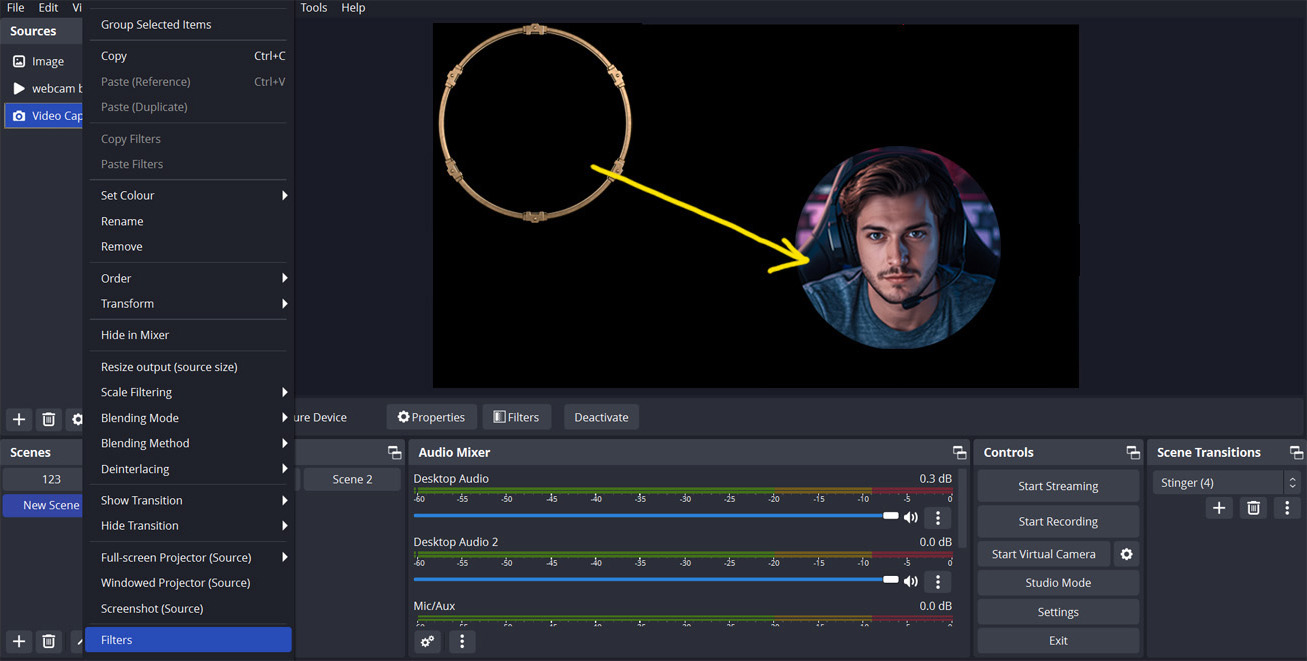
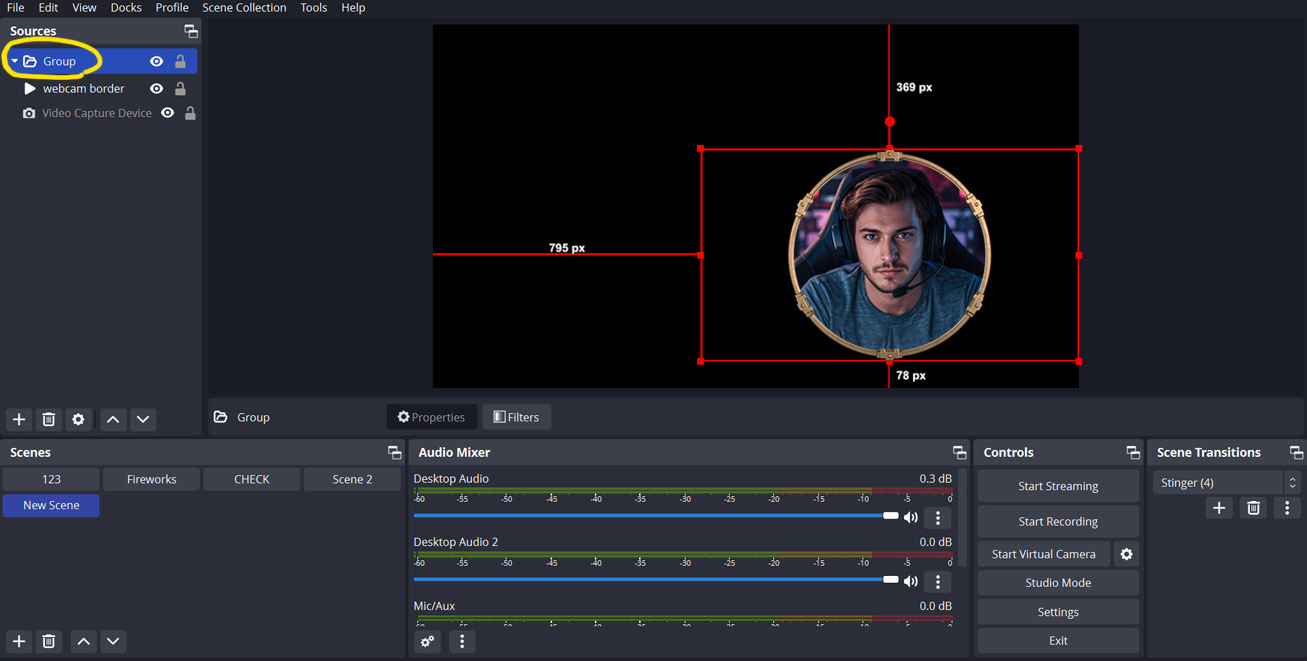
8. Next, readjust your webcam frame and group the webcam mask and frame. Select these sources, right-click on them, and select Group Selected Items. Now all your webcam elements have been combined into a single scene, and you can move them together.
9. If your webcam pack includes a shadow file:
Click “+” in the “Sources” section and select “Image Source”.
Select your shadow file and click “Open”, then click “OK”. Then just place the shadow layer under all layers in the group and align.
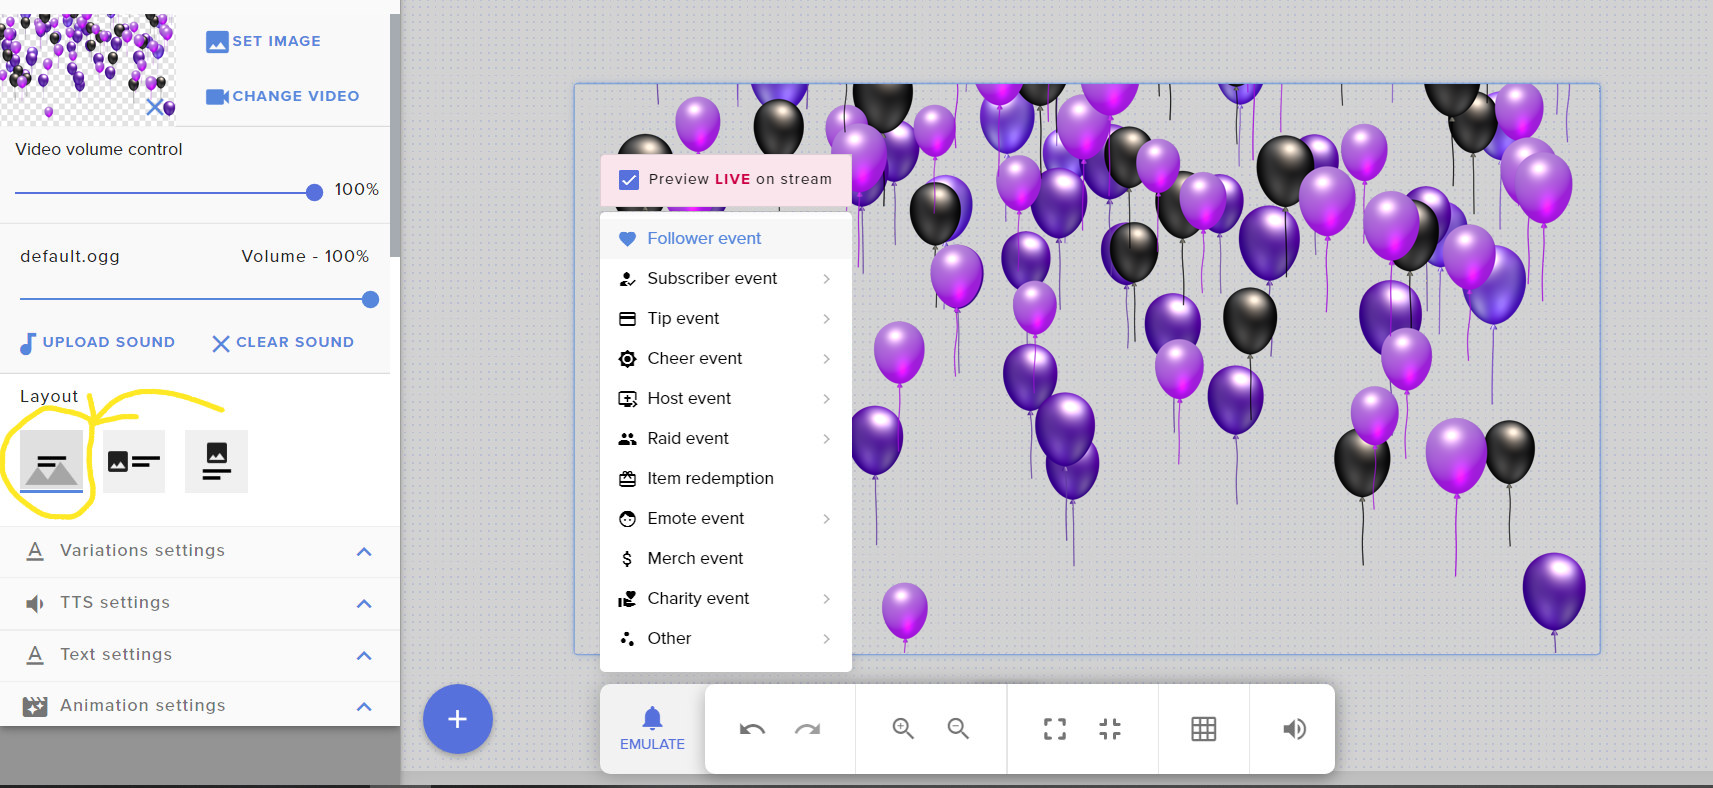
8
Question: How to add an alert in fullscreen mode in StreamElements?
Answer: Go to Stream Tools → Overlays → My Overlays and open your alert.
In the Layout section, click the Fullscreen icon.
Test or adjust the alert in fullscreen mode.